All In One WP Security & Firewall
Objective: it helps to add some extra security and firewall to your site by using a security plugin that enforces a lot of good security practices.
Brute Force Attacks: one of the ways hackers try to compromise sites is via a Brute Force Login Attack.
This is where attackers use repeated login attempts until they guess the password.
Apart from choosing strong passwords, monitoring and blocking IP addresses which are involved in repeated login failures in a short period of time is a very effective way to stop these types of attacks.
Step 1: Install All In One WP Security & Firewall in Wordpress Application
1. Visit the URL as http://<your_domain>/<wp_installation_path>/wp-admin or https://<your_domain>/<wp_installation_path>/wp-admin where your Wordpress installed.
2. Login to the admin panel with the Wordpress Username and Password.
3. From the left panel of the dashboard, click on the Plugins menu and Add New link.
.png)
4. Now search for the plugins and click Install Now button.
.png)
5. After installation, click on the Activate button.
.png)
Step 2: Managing All In One WP Security & Firewall plugin
Now from the left panel, click on Settings link, Follow the options listed under the plugin.
1. Under WP Security menu, click on WP Version Info tab, mark Remove WP Generator Meta Info, and Save Settings to remove the versions and meta info produced by WP from all pages.

2. Under User Login section,
To enable Login lockdown options follow the steps,
A. Enable Login Lockdown Feature.
B. Set the value for maximum login retries in Max login attempts.
C. Set Login retry time period for any particular IP address attempt failed login within that stipulated time.
D. Set the Time length lockout for the time duration the IP address prevent from login attempt.

Here the lockdown IP addresses will be listed,

If want to white list any IP from preventing lockdown, Enable the whitelist option and type the IP on the below text area field.

3. Under User Registration,
A. Click on the Manual Approval tab, enable manual approval of new registration. This will allow the admin to approve newly registered users manually.

B. Check this if you want to insert a captcha form on the WordPress user registration page, check the option Enable Captcha on Registration Page and Save Settings.

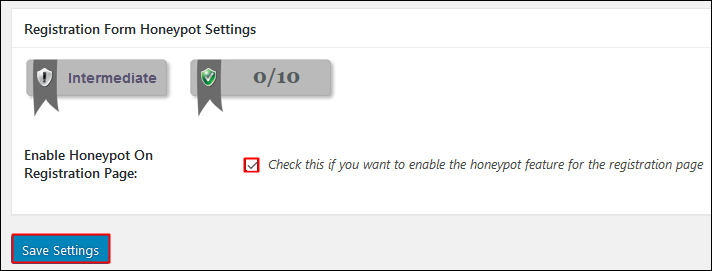
C. Check if you want to Enable the HoneyPot features on registration page. This feature allows you to add a special hidden "honeypot" field on the WordPress registration page. This will only be visible to robots and not humans.
4. Under Database Security,
A. Click on the DB Prefix tab, if want to generate a random number(6 digit) as table prefix for the WP database (It is recommended that you perform a DB Backup before using this feature).

B. Click on DB Backup tab, if want to backup your database.
You can do it manually by clicking Create DB Backup Now button or also by Automated Schedule Backup as follows,
Your DB Backup File location will be under: [WP_DIR]/wp-content/aiowps_backups/Backup_name.zip.

5. Under File System Security,
A. Click on File permission tab, where a list of your files will be shown and notify if any action is require.

B. Check Disable ability to Edit PHP Files, if you want to remove the ability for people to edit PHP files via the WP dashboard.

C. Check below options, if you want to prevent access to readme.html, license.txt and wp-config-sample.php.

D. Enter the system log file name, to view the Log reports specifically.

6. Under WHOIS lookup, it allows you to look up more detailed information about an IP address or Domain name by querying the WHOIS API.

7. Under Blacklist Manager, to enable the banning (or blacklisting) of selected IP addresses and/or User Agents, and add the IP address or User Agent as given below.

8. Under Firewall tab,
A. For Basic Firewall, enable if you want to apply basic firewall protection to your site.

B. Enable to Completely Block Access To XMLRPC, also can enable Disable Pingback Functionality From XMLRPC and click on Save Firewall Settings.

9. Under Brute Force, enter the URL path that you would like to setup for further prevention of BruteForce Attack.

10. Under SPAM Prevention, enable Captcha On Comment Forms.
This feature will add a simple math captcha field in the WordPress comments form.
Adding a captcha field in the comment form is a simple way of greatly reducing SPAM comments from bots without using .htaccess rules.

11. Under Scanner tab, click on Perform Scan Now button, for checking if given an opportunity that hackers can insert their code or files into your system which they can then use to carry out malicious acts on your site.

12. Under Maintenance tab, mark Enable Front-end Lockout and can write down the information to show any lockout visitors will view your site.
13. Under Miscellaneous tab,
A. You can enable Copy Protection. This feature allows you to disable the ability to select and copy text from your front end.

B. Enable iFrame Protection. This feature allows you to prevent other sites from displaying any of your content via a frame or iframe.

