|
Article ID: 3
Last updated: 19 May, 2020
Steps to Creating Email Auto Reply/ Vacation MailObjective: If you are going on vacation and will not be able to check your mail for a while, you may want to leave a vacation notice that will be automatically sent to your correspondents once they send e-mail to your address. This is done with Auto-Reply facility, also referred to as auto-responder. Aside from vacation notices, organizations can use automatic replies to notify customers that their orders or technical support requests were received and will soon be processed. Auto-Reply can include pre written messages in plain text or HTML format, and they can contain attached files as well.
Step 1: Log in to the Plesk Control Panel. Step 2: Select the domain. Now click on the Mail Accounts icon. Step 3: Then click on the email ID from the E-mail address list for creating Auto-Reply.
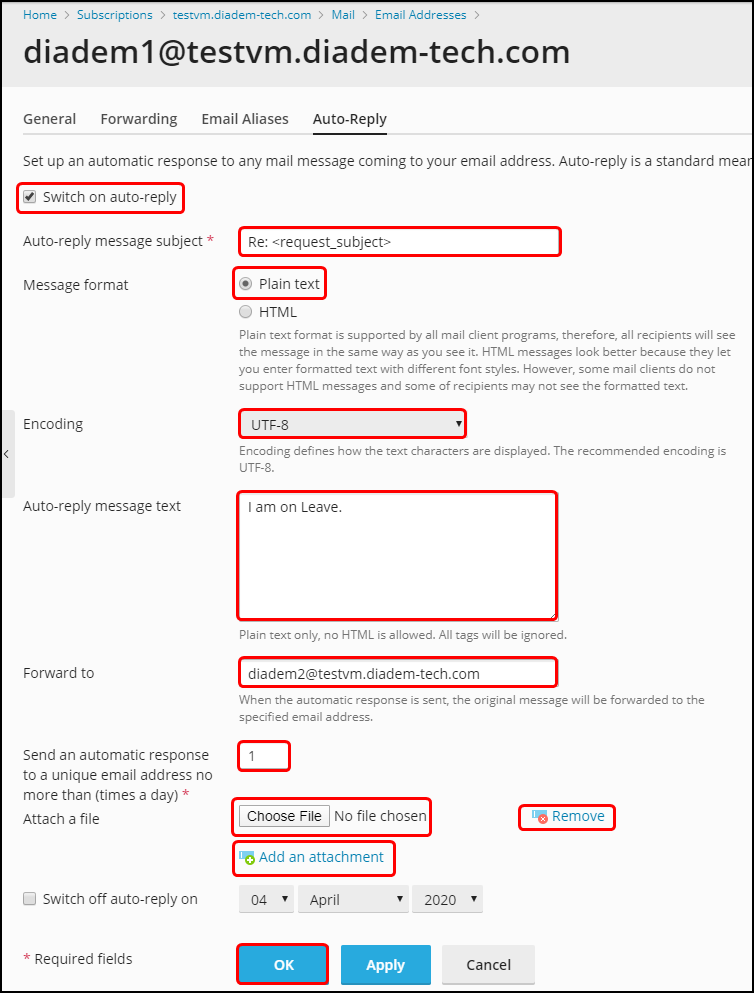
Step 4: Click on Auto-Reply tab.
Step 5: Below are the descriptions of the number sequence.
Step 6: You are done,your Email Auto-Reply has been created.
This article was:
Report an issue
Article ID: 3
Last updated: 19 May, 2020
Revision: 97
Views: 4415
Comments: 0
|


.png)
.png)
.png)

Powered by KBPublisher (Knowledge base software)