Diadem Technologies Support Knowledgebase

How to enable Node.js Support in Plesk

Article ID: 1113
Last updated: 08 Jul, 2021

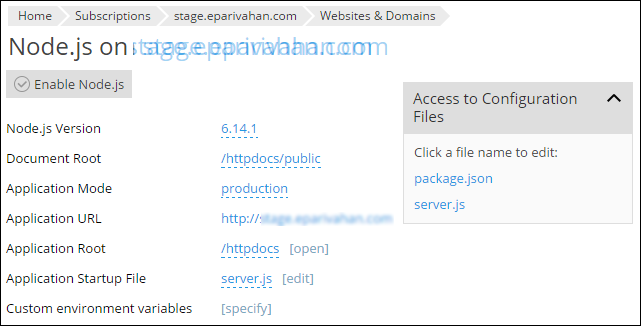
Install Node.js support at Plesk Onyx through updating the plesk

Plesk Onyx offers Node.js support. Node.js is an open-source, cross-platform runtime environment for developing server-side Web applications.

     Step-01: Installation process

1. Login to the Plesk Onyx control panel with admin user.
2. Now at the left hand side panel of plesk Onyx, click on Tools and Settings option.
3. On Tools and Settings page under Plesk option click on Update and Updates and Upgrades.


4. Once clicked a window will pop up showing “Install and Update Plesk” option , on the same page click on “Add Remove Components” option.

     Step-02: Select required packages for Installation

5. On Add/Remove components screen , click on + sign near Web hosting option and select “Node.js Support”
6. Node.js requires Phusion Passenger server to be installed as its dependent component hence we will have to select the Phusion Passenger server option too.


7. Click on Continue button and wait for the installation to be finished.
8. After successful installation you will see the related message on the Plesk screen. Please select OK to close the installation session.

9. Now we can domain wide enable and access the Node.js application from plesk panel.

10. After that we need to enable the Node.js support from Plesk panel.


NOTE: To install dependencies for Node.js application and install websocket modules at Plesk server, please follow the below given link:
           Link: https://kb.diadem.in/how-to-install-dependencies-for-nodejs-application_1117.html

This article was:  
Report an issue
Article ID: 1113
Last updated: 08 Jul, 2021
Revision: 8
Views: 685
Comments: 0
Tags