|
...
...
|
Article ID: 1422
Last updated: 18 Nov, 2024
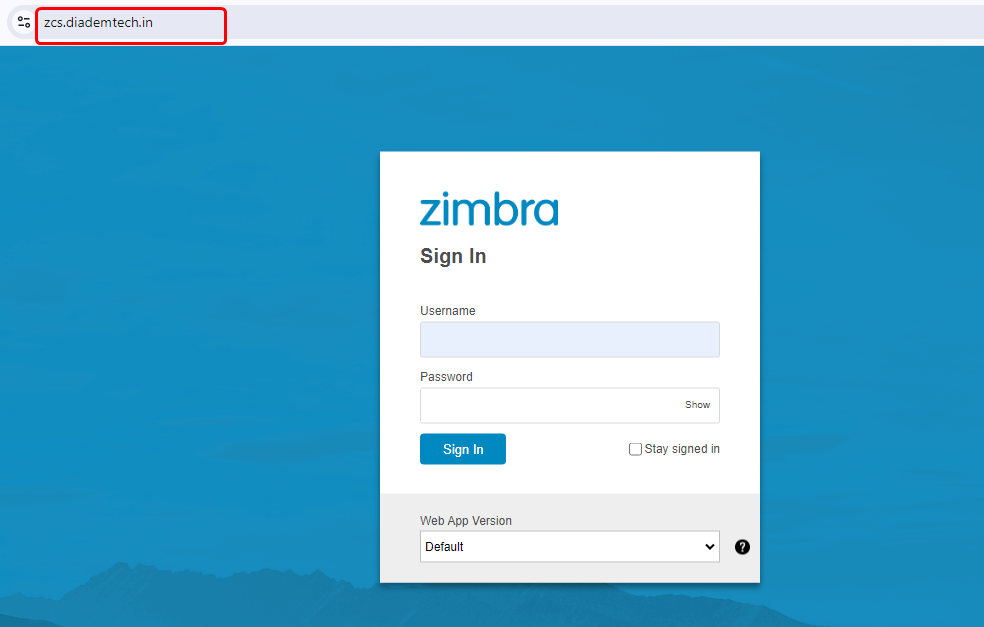
How to Use Zimbra Connect ChatThe following are the steps to initiate 1 to 1 chat with other Zimbra accounts in your domainBelow are the following steps to initiate the chat process: Login into Zimbra webmail panel URL: https://zcs.diademtech.in
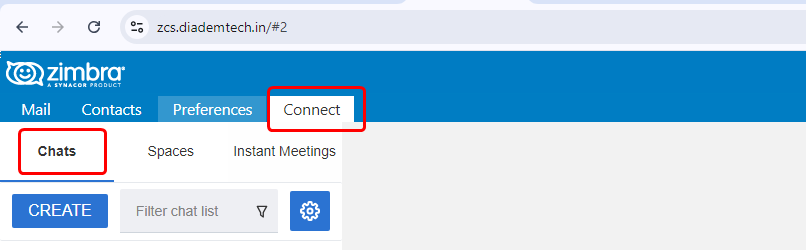
Go to the 'Connect' TAB from the webmail interface and click on the chats option
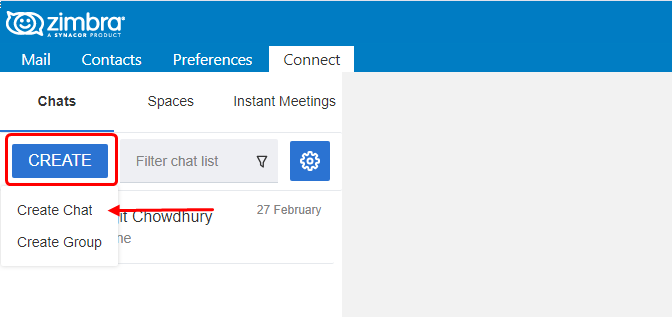
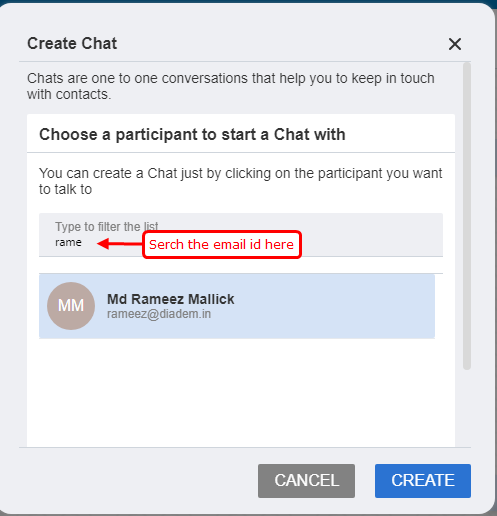
After clicking on the 'Create chat' then a new pop-up will display and search the email id and click on that 'email address' and click on the 'CREATE' option.
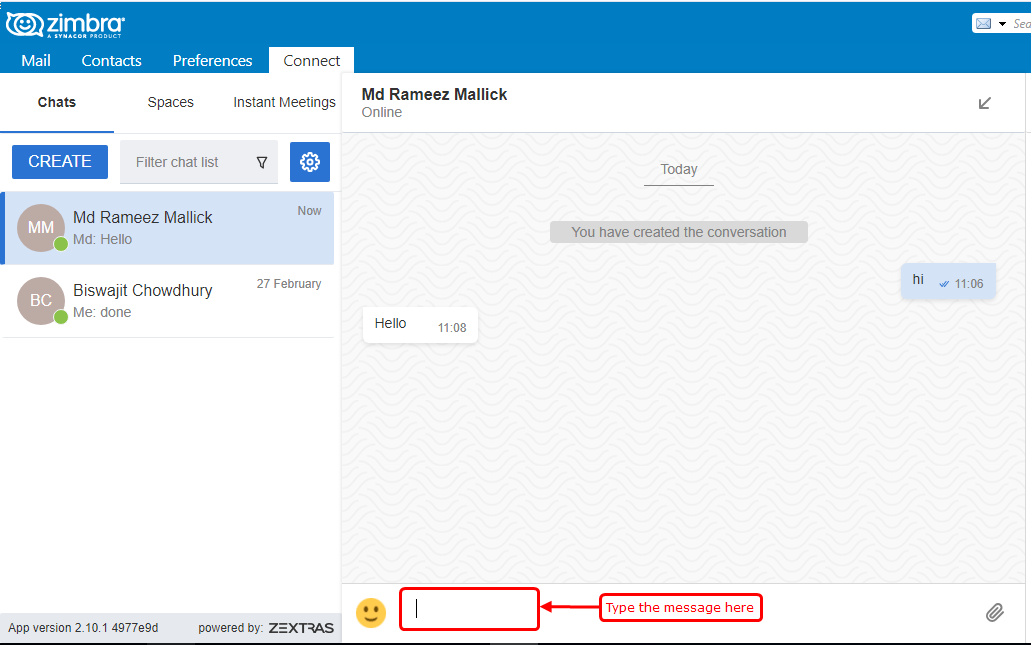
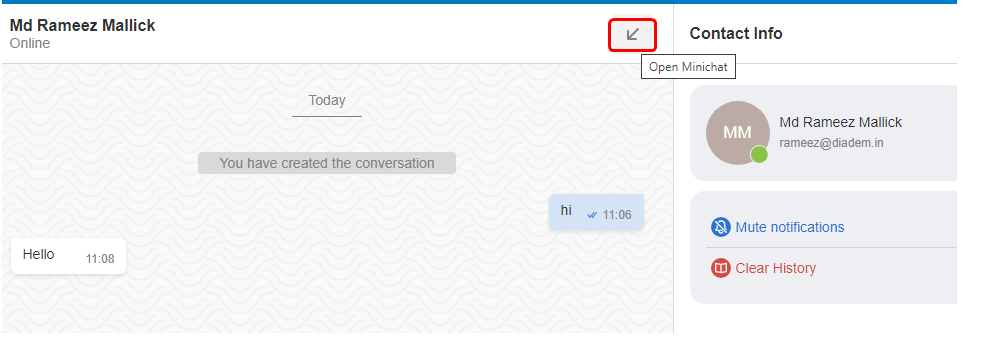
The 'chatbox' is open and type the message in the 'dialogue box' and press 'enter' Note: In this chatbox, you can easily see the sender’s last scene, their contact information If there is a 'single tick' means it is not seen by the sender and if it is seen 'blue colored double tick' means it has been seen
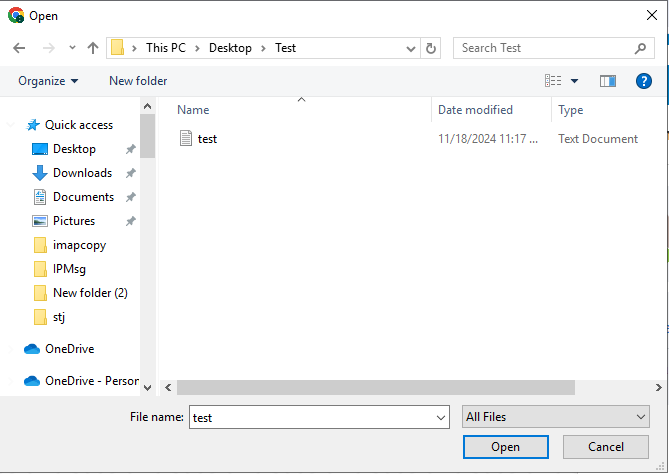
You can upload multiple files and insert comments on the individual file and folders. To do this, click on the attachment settings, which will open a Windows File Explorer window where you can select the files as needed.
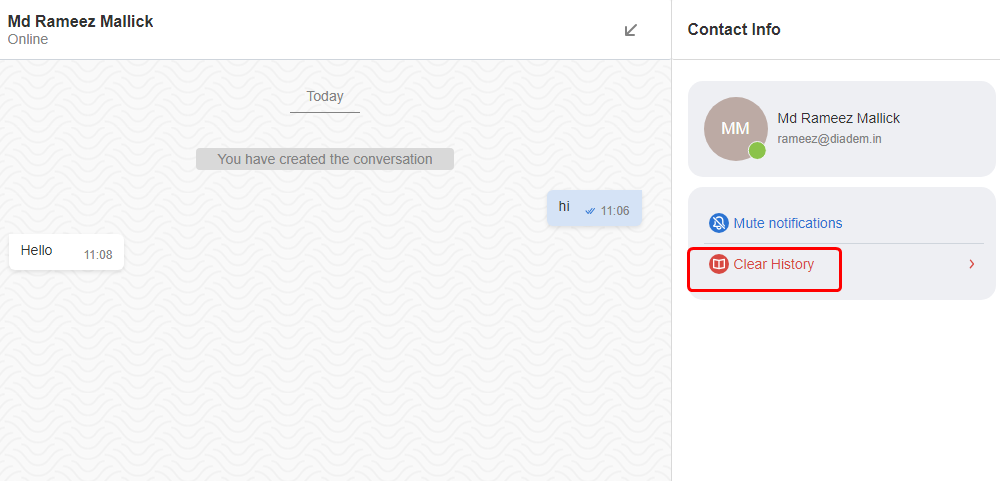
The 'chat history' option will show you your past conversion and the 'clear history' will clear your chat history with the user.
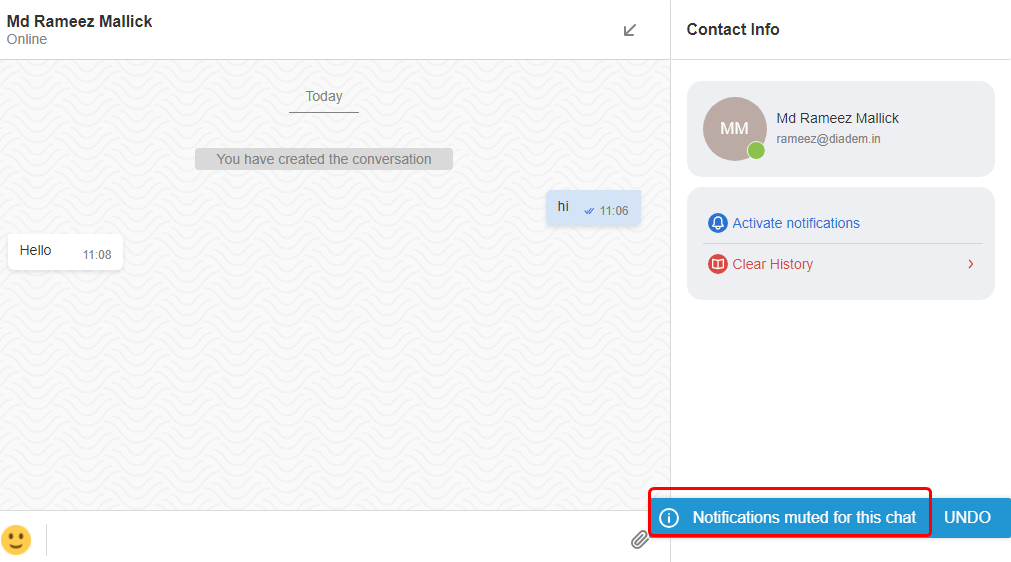
On the 'Notifications' toolbar, you can mute or open the notifications for the individual’s email address and get notified as you want
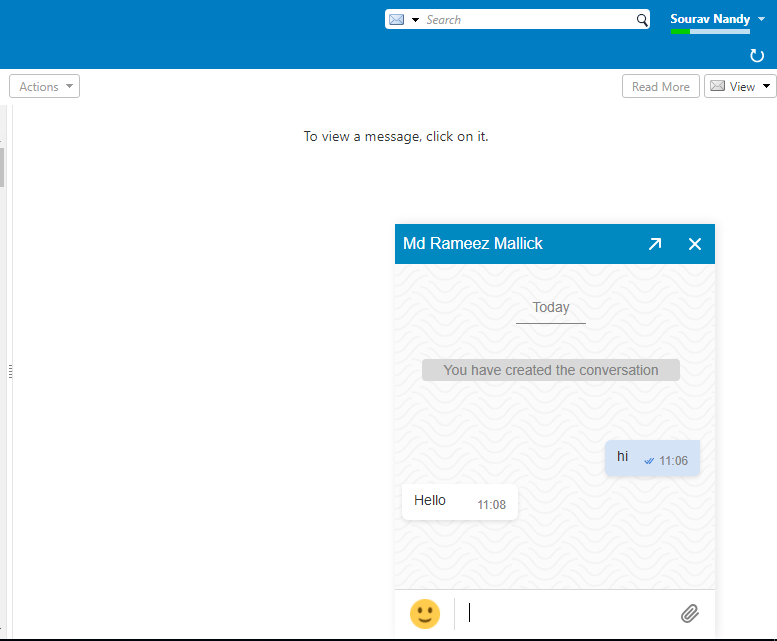
Clicking on the Arrow link, the chat screen will 'minimize' the chat window and you can continue to work on your emails and also chat on the same screen.
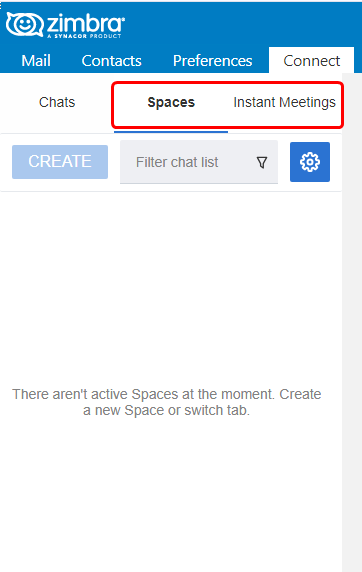
'Spaces' and 'Meetings' are addon features and to activate the same, please send an email to us at support@diadem.
This article was:
Report an issue
Article ID: 1422
Last updated: 18 Nov, 2024
Revision: 16
Views: 1429
Comments: 0
Tags
|


Powered by KBPublisher (Knowledge base software)