|
|
Article ID: 1372
Last updated: 10 Jan, 2021
Obtaining a Server Certificate from Let's Encrypt Using Certify The WebCertify The Web (a.k.a Certify) is a Let's Encrypt GUI for Windows, allowing you to request, deploy We need to follow the below-mentioned process to complete the setup of the SSL certificate. Install Certify The Web ("Certify")Step:1 Open the URL for downloading Certify:- https://certifytheweb.com Step:2 Run the installer as an Administrator Step:3 Accept the license agreement and then click the Next button: Step:4 Leave the default installation path then click the Next button: Step:5 Click the Next button: Step:6 Click the Install button: Step:7 Click the Finish button:
Configure Certify the WebStep:1 Launch Certify The Web, this message will be displayed, click the OK button: Step:2 Enter your email address([email protected]) then click the Yes, I Agree option and the REGISTER CONTACT button:
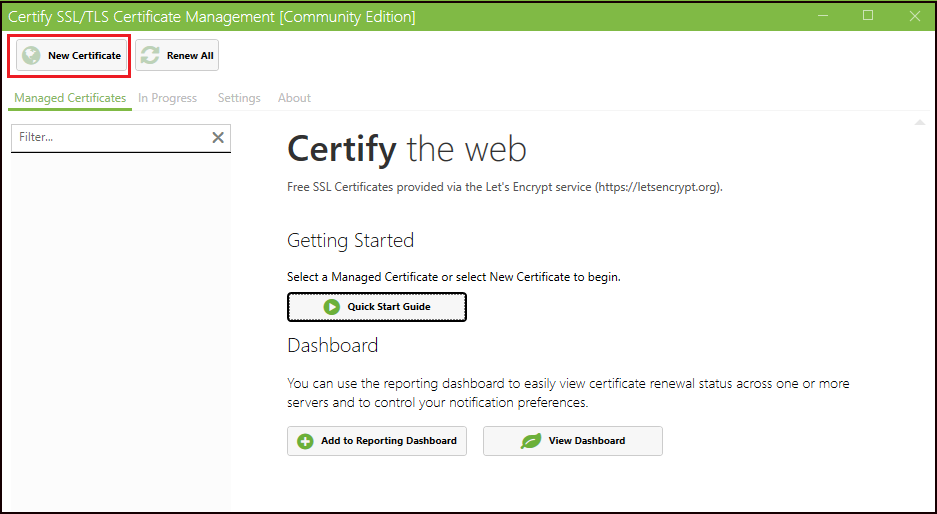
Step:3 The Certify user interface will be displayed. Click the New Certificate button: Step:4 In the Certificate Domains property sheet:
Step:5 Once the ADD DOMAINS button was clicked a new row is added to the property sheet to reflect that
Step:6 Click the Authorization button to proceed to the next property sheet. Step:7 The Domain Authorization sheet requires the Website Root Directory. Start IIS Manager and navigate in the
Step:8 Select the text in the Physical Path text box and copy it to the clipboard: Step:9 Return to the Certify The Web app and in the Domain Authorization property sheet:
Step:10 Then click the Deployment button to proceed to the next property sheet. In the Certificate Deployment sheet:
Step:11 Then click the Show Advanced Options check box. Clicking the Other Options button displays this sheet and the default settings are acceptable: Step:11 Click the Test button Step:12 Assuming the test completes successfully click the right arrow to collapse the Test Progress pane: Step:13 If the test were successful proceed by clicking the Request Certificate button: Step:14 If the test was unsuccessful, see the Troubleshooting section at the end of this article. The request process will begin: Step:15 It should complete successfully: Step:16 Click the Settings tab, the defaults are acceptable: Verify the Certificate InstallationStep:1 In IIS Manager, check the bindings for TCP 443. Navigate to the Default Web Site in the left pane and click on Bindings in the Actions pane on the right: |
.png)


.png)


Powered by KBPublisher (Knowledge base software)