|
Article ID: 1268
Last updated: 15 Feb, 2021
To perform Plesk configuration we need to enable below mentioned options:-
For Updating the Security Mode of Plesk Panel go to Under Security options click on Security Policy
Once you click on Security Policy. Select (Allow both secure FTPS and non-secure FTP connections) under FTP usage policy. Under Password Strength select Medium strength.
Under Security option Click on Web Application Firewall(ModeSecurity).
For enabling Firewall Click On for enabling Mode security.
Inorder to check if public IP address is configured in plesk as shared IP or not.
Click on the Public Ip address
Now select the Shared so that IP address can used as shared IP among the hosted application.
Inorder to Set dedication Application Pool to each subscription, go to Tools and Settings then scroll down and look for Applications and database under which click on IIS appliation Pool.
Then click on Global Settings Tab.
Go to Mail and then Select Mail Server Settings.
Now beside Maximum message size type 35840 KBytes and under Relay options tick beside SMTP
Scroll down then provide the Ip address along with the mask then click on add button for adding IP address/mask
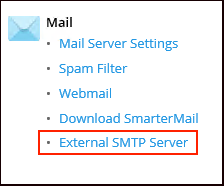
Under Mail select External SMTP Server.
Tick beside Allow Plesk to send email notifications through this SMTP server and also tick beside Use the mail server installed with Plesk and the default and the default mail account created by Plesk.
Now under Plesk select License Management or adding your Plesk License into your Plesk Panel.
Click on Install Key.
Paste the activation code you received, then click ok and your Plesk will be ready to use.
This article was:
Report an issue
Article ID: 1268
Last updated: 15 Feb, 2021
Revision: 11
Views: 631
Comments: 0
|
.png)
.png)


.png)
.png)


.png)


