Installation and Configuration of SolidCP with Windows OS
The following is required in advance:
- Windows Server (2003 or above)
- SQL Server (2005 or above)
- Download and install Web Deploy: http://www.iis.net/downloads/microsoft/web-deploy
- Download and install the SolidCP http://solidcp.com/downloads/
- The setup wizard will install SolidCP on your server, check the check box beside "I accept the terms in the license Agreement" click "Install".
- Click on Install to continue.
.png)
- Click finish to complete the installation.
.png)
- Open the SolidCP, then click “View Available Components” .
.png)
- Click on Install beside SolidCP Standalone Server Setup.
.png)
- SolidCP download manager will appear which will download the setup files.
.png)
- Click on NEXT to continue.
.png)
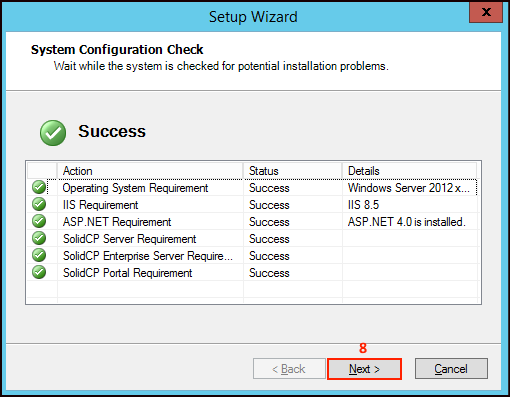
- System Configuration check will appear, click NEXT to continue
- Provide the IP address.
- Type the Host name.
- Click Next to continue.
.png)
- Type localhost beside SQL Server
- Select the Authentication type.
- provide the username and password
- Click Next to continue.
.png)
- Now set the administrative password.
- Click NEXT to continue.
.png)
- Once the installation procedure is completed click on Next to complete the setup
.png)
Note : In order to access SolidCP open your Internet Browser then type your Server IP address which you have assigned during post installation along with port number for example http:\\10.0.0.1:9001.
Configuring IIS for SolidCP
- Open IIS Management --> Click on "Application pools"
- For each SolidCP Application pool
- click: --> Advanced settings...
.png)
- Set startmode to "AlwaysRunning"
.png)
- set Idle Time-out (minutes) to "0"
.png)
- set Regular Time Interval (minutes) to "0"
- Click on OK.
.png)
Note :
- Repeat the step from 1 to 7 for each SolidCP Application pool.
- Above IIS configuration is required only when you want to configure shared server.
Adding Domain into the Solid CP
For Installation and configuration of Domain follow the below Steps-
- Once you login into SolidCP under Systems you will get an option Domains Click on it.
.png)
- Now Click on Add Domain.
.png)
- Click on Domain.
.png)
- Now provide the Domain name.
- type the host name.
- Tick beside Allow customer subdomain if you want to allow customer to crate subdomain.
- Click on Add Domain.
.png)
- Now go to Web Sites.
.png)
- Click on the website name.
.png)
- Tick the checkbox beside Enable Write Permissions.
- Tick the checkbox beside Enable Static Compression.
- Click on Save Changes.
.png)
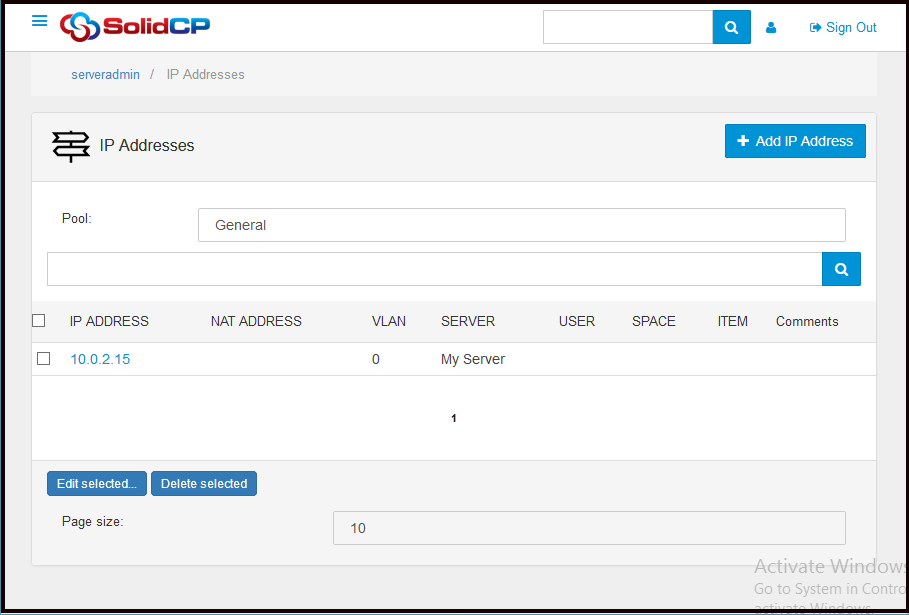
- Now go to left pan expand Configuration.
- Go to IP address click on it.
.png)
- Now check whether your IP address has been added.
- Now under System Settings go to web platform Installer settings provide the developer url.
.png)