Step 1: To view and configure mail setting for the Plesk server Go To Tools & Settings > Mail Server Settings (in the Mail group).
Step 2: Under Tools and Settings Go to the Mail section and select Mail Server Settings.
Step 3: To enable the mail service server-wide check on the check-box "Enable mail management function in Plesk".
Step 4: Installed Mail Server : Mail server Installed will be displayed here.
Step 5: Installed IMAP/POP3 server: It will display which service is installed for IMAP/POP3 in this server as here "Courier-IMAP is installed".
Step 6: Maximum message size: Enter the value for the maximum message size you can send from the server.
Step 7: Maximum number of connections: Number of concurrent connections users can make to the server via IMAP/POP3 protocol.
Step 8: The maximum number of connections per IP address : The number of simultaneous connections that can be done from one IP address.
Step 9: Enable SMTP service on port 587 on all IP addresses: Check the check-box on so to enable port 587 for all the IP addresses as to allow your customer to specify the port 587 for the outgoing SMTP connection.
Step 1: Send from domain IP addresses: The Hostname used in the STMP greetings is the Plesk server Hostname which has been set in the server settings.
Note 1: Send from domain IP addresses and use domain names in SMTP greeting: Once one selects the domain the Plesk sends The SMTP greeting containing the name of the domain from which the email message is sent.
Note 2: Send from the specified IP addresses: Sending mails from specific IP addresses, you need to select the specific address from the drop-down.
Relaying is an option that allows emails to be sent with or without authentication from anyone over the internet. , it routes an e-mail to the correct destination. There are different types of email routing detail discussion is given below:
Closed: Close relay only accepts those messages which are addressed the users who have mailboxes in this server any one from the server won't be able to send mails using outgoing SMTP server.
Authorisation is required : The recommended setting is to send mails using authorisation, you can authorise the users for sending mails using the below given methods.
a. POP3 lock time : Using this method your user once have successfully authenticated to the POP server, they are permitted to receive and send email through the mail server for the specified period of time.
b. SMTP : The users need to authenticated to the mail server for sending mails to external email addresses.
Switching outgoing limitations will help you out in preventing spam mails to get relayed to other email addresses, you can configure the limitation as per your server's need, there are different types of limitations that can be configured to stop outbound spam.
Step 1: To activate outgoing email limitation check the check box
Note: Default limit on outgoing messages from a mailbox: The maximum number of emails that a user can send within one hour.
Step 2: Default limit on outgoing messages from a domain: The maximum number of mails that all users of a domain can send within one hour.
Default limit on outgoing messages from a subscription: The maximum number of mails that all the users of a subscription can send within one hour.
Step 3: Allow users and scripts to use Sendmail: Enabling the option subscription system users and scripts can send mails from the server, the maximum number of mails that can be sent depend upon the number allowed in the subscription.
Show reports based on statistics for the last: Reports are generated against the user or subscription system users those who exceeds the outgoing limit. Send an email notification every: Send notification on hourly basis to server admin with the details of users who has exceeded the hourly outgoing limits.
To enable the SPF protection check on the check box Enable SPF spam protection to check incoming mail, this will check the SPF records of the incoming mails and can decrease the receiving of incoming spam mails.
SPF checking continues when there are DNS lookup problems enabling this option will continue checking if the DNS lookup fails.
SPF checking mode : Setting the modes will effect the mails rejection, as if the SPF fails to resolve it will reject the mail.
SPF local rules : the rules that are used by the spam filter before the SPF check is actually done by the mail server, to by-pass from SPF checking you can add the IP addresses or hostnames.SPF guess rules : the rules that are applied to domains that do not publish SPF records.
SPF explanation text : Custom rejection text to be entered if the mails are rejected by the server.
DNSBL or RBL is a method of reducing receiving of spam mails, it checks IP address reputation of different RBLs, you can add the RBL sites in the respective text box.
To enable the protection check on the checkbox Switch on spam protection based on DNS blackhole lists.Common RBLs include:
For White listing a network or or a IP address from which you want to receive emails you can add the IP address in white List section, once you add the Ip address any domain which is assoicted with that Ip will be white listed on your server and you will be getting emails from them.
Step 1: Click on Add Network
Step 2: Add the Ip address and click save.
Step 3 : once IP address is added you can check once from the list of table as shown in below image.
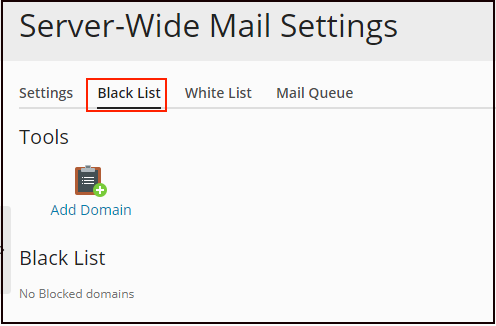
For Black listing a Domain from which you do not want to receive emails you can add the Domain name in Black List section, once you add the Domain name, once domain is added non of the email user will be able to send email to your Domains email users.
Step 1:
Step 2 : Add the Domain and click save.
Step 3 : Add the Domain and click save.
Note : if you wish White List and Black List email ids only then you may follow the below mentioned KB article.


.png)


.png)


.png)