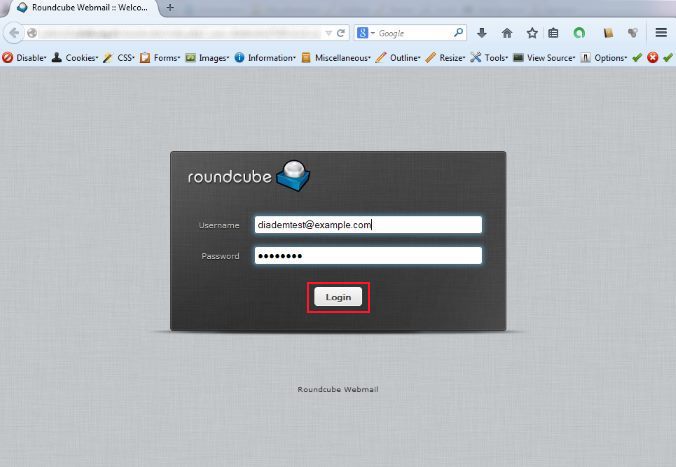
Login to the Roundcube Webmail
Open the URL in the format http://webmail.<yourdomanin.name>/ in your web browser. The site shows the Login screen, which is used to authenticate a user. Please type-in your full email address and password into the respective fields on the Login screen. Hit the Login button or press <Enter> on your keyboard to authenticate.
Messages List
This part of the screen is displaying the list of all messages in the currently selected folder. The number of messages displayed in the list and the total number of messages in that folder is stated right below the list. According to your settings, this list only displays a limited number of messages at a time. Use the allow buttons below the list to browse through the multiple “pages”.
The application periodically checks for new messages and will update the display if new emails arrived. You can force this check manually by clicking the Refresh button in mail view the toolbar.

Open a Message for Reading
If the Preview Pane is visible, a single click on a message will display it in the preview right below the list. In order to open a message in full view or a new window (depending on your settings), double-click it with the mouse. Another way to open a message in a new browser tab or window is to right-click on the subject and then to choose “Open Link in New Tab/Window” from the browser’s context menu.
Selecting a message in the list will also activate toolbar buttons that offer further actions related to the selected message, such as replying, forwarding or deleting it.
Sending Email Messages


Composing a New Message
Click on the Compose toolbar icon opens the message compose screen. Depending on your settings it opens in the current browser tab or in a new window.
Enter at least one recipient address or select them from the address book, type in a subject and the message text and click the Send button in the toolbar when you’re ready to send the message.
Save it as Draft (toolbar icon) if the message is not yet complete and you’d like to finish and send it at a later time. The email will be stored in the Drafts folder and can be double-clicked there in order to resume composition.
Hint: while composing a message, copies are periodically saved to the drafts folder to avoid unintentional loss. In case the session terminates unexpectedly or your computer or browser crashes, you’ll find a copy of the message on the Drafts folder. You can configure the automatic saving interval in the User Preferences.
Reply to a Message
If you want to respond on a received message, click the Reply or the Reply all button in the toolbar or the equivalent buttons in the Preview Pane. This will also open the compose screen but with a quote of the message you’re replying to and with the recipient(s) pre-filled.
While Reply will copy the sender address into To field, Reply all will add all recipients of the original message to the To and Cc fields.
Forwarding Messages
Messages can also be forwarded to somebody by clicking the Forward button in the toolbar. The compose screen will contain the message text and all attachments already added. You can still add more attachments or remove some you don’t want to forward.
The Forward toolbar button offers the following options:
Forward inline
In this (default) mode, the content of the original message is copied to the message text editor and can be altered or deleted. Also attachments of the original message are copied to the new message and can be removed individually. Attention: this mode can truncate or re-format HTML formatted messages.
Forward as attachment
With this option, the original message is copied as attachment to the forwarding message. This will preserve the message with all its formatting and attachments and doesn’t allow you to alter anything.
Adding Attachments
In order to attach files to the message, click the Attach button in the toolbar and then select the file on your computer using the file picker dialog that opens. Attachments to be sent with the message are listed on the right and can be removed again by clicking the Delete icon of the according file.

If your browser supports HTML5, you’ll see the file-drop icon at the bottom of the attachment list. That means you can drag a file from your computer’s file explorer with the mouse onto that icon in order to attach it to the message.
Organizing your Email Messages
The folder list in the mail view lists all folders that can be used to sort mails into for temporary or final storage. You manage the folders in the settings section and freely choose the hierarchy of the folder tree.
Special System Folders
Some of the folders have a special meaning and are used by the system to place messages in. These special folders are indicated with an individual icon in the list and usually cannot be deleted or renamed.
Inbox
This is where new messages arrive.
Drafts
When composing messages you can save them temporarily as draft. Such messages are stored in this folder can be picked up for editing here.
Sent
Unless configured otherwise, a copy of each message you compose and send to others will be saved to this folder.
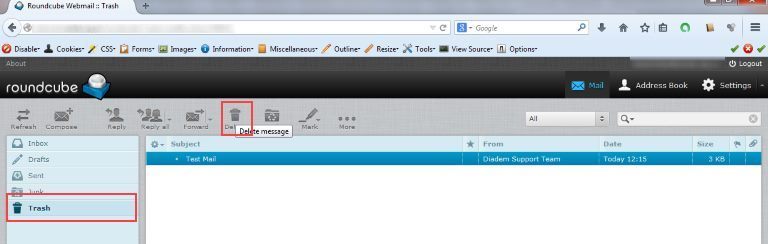
Trash
When you delete a message it is moved to this folder and not deleted immediately. Depending on the email server’s settings, trashed messages will automatically be removed from this folder after a certain time. You can also empty the trash folder manually with the Empty command from the Folder actions menu.
The assignment of special folders can be changed in Preferences > Special Folders.
Delete Messages
The selected message(s) can be deleted from the current folder by clicking the Delete icon in the toolbar or by hitting the <Del> (or Backspace on Mac) key on your keyboard. This will by default move the message to the Trash folder and not delete it right away unless you do this for messages in the Trash folder. In order to delete the message in first place, hold down the Shift key on the keyboard while clicking the Delete button or when pressing <Del>.
There’s a preference in Settings > Preferences > Server Settings where the default behaviour of message deletion can be changed.
Settings

The behaviour as well as the look-and feel of the application can be adjusted in various ways. The Settings task holds all the switches and panels to configure your personal webmail.
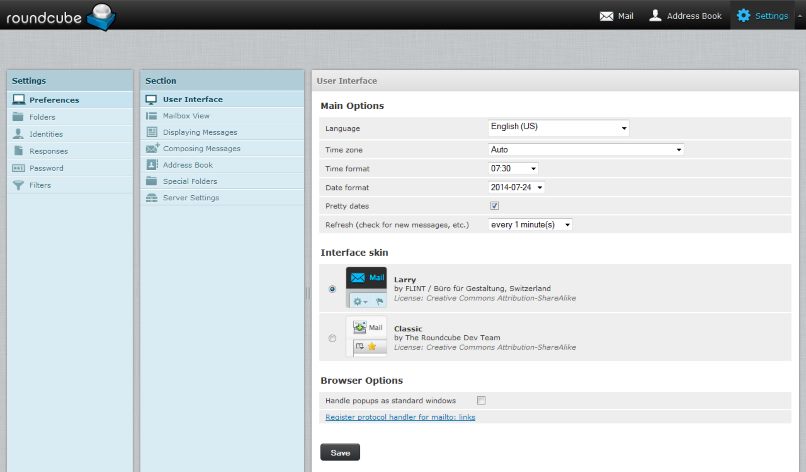
Preferences
The user preferences let you adjust various options and settings that control the behaviour and the UI of the webmail application. The numerous settings are grouped by the following sections:
Hint: after changing preferences, don’t forget to save them by clicking the Save button below the settings form.
User Interface
Mailbox View

Show preview pane
This shows or hides the Preview Pane in the mail view.
Displaying Messages

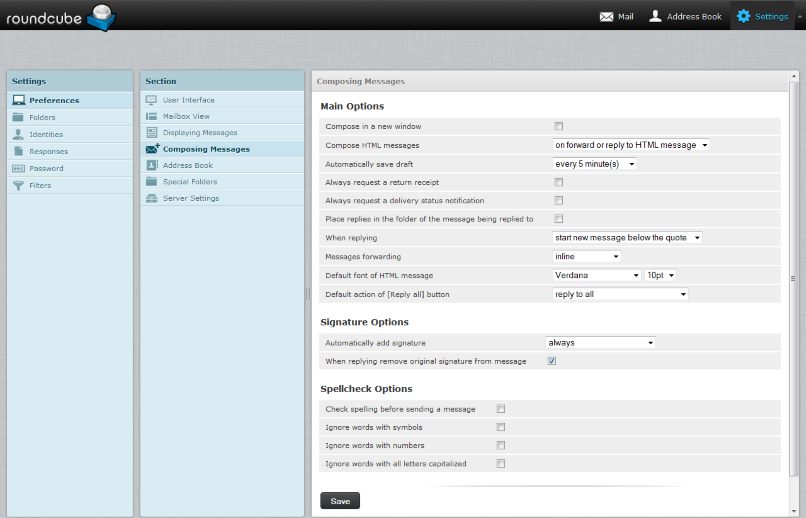
Composing Messages
Server Settings

This section provides more advanced settings that control how messages are treated by the email server.
Change Password

Password can also be changed by user from the Roundcude settings, if required.
For more detailed documentation of Roundcube features, please visit - http://docs.roundcube.net/doc/help/1.0/en_US/
