|
...
...
|
Article ID: 1345
Last updated: 11 Jan, 2022
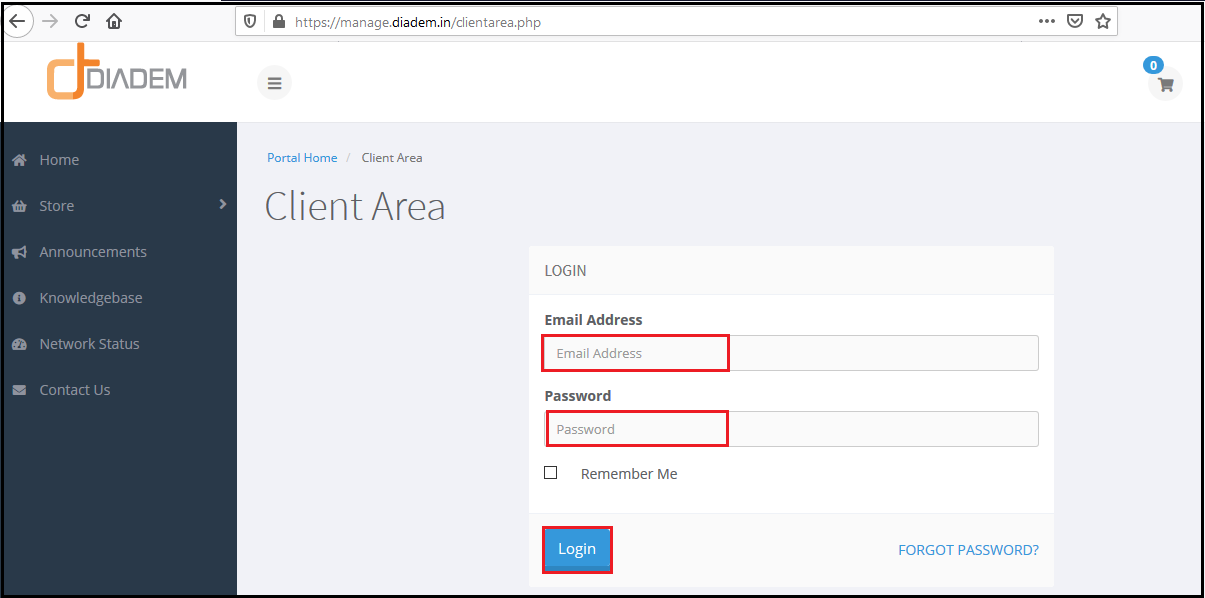
Manage Zimbra Email Services from Client PortalQuick Navigation You need to login into your client account at: https://manage.diadem.in/clientarea.php Enter the email address and the password then click on login as the client on the next window.
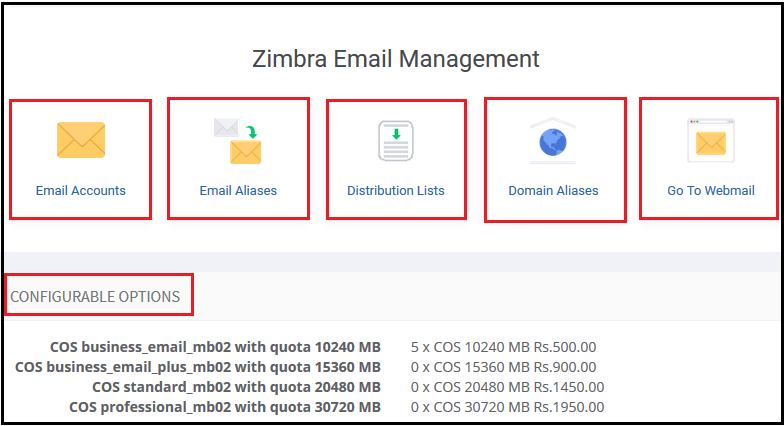
Select the option Services as given below. Click on the manage button of the particular service you want to manage. For example: if you want to opt for Zimbra, then click on manage to go for Zimbra setup. You will get the following options to manage the Zimbra service along with all the details of the products available. To manage a mailbox, click on the option Email accounts as shown in the image below. For managing the email accounts through the client area you can click on Email Accounts Tab.
The image given below shows the creation, editing, and deletion of an email address or mailbox in Zimbra.
Put the name, email address, or username, display name of an email address and the mailbox quota for that particular email address, and then click on Confirm. The status section shows whether you want to keep the email address active or locked as shown in the image. The image below shows the editing, deletion, and additional actions for a particular mailbox respectively. The first action of the highlighted option shows you can change status, i.e. keep it active or locked, or suspended. The second option shows to change the password of a mailbox. The third option shows to login to the Zimbra webmail.
The mailbox login image is shown below.
You can create an Email Alias by clicking on the Email Alias Tab.
You can create email aliases also if needed by clicking on Add Email Alias option as shown below. For managing the Distribution list through the client area you can click on Distribution Lists.
If you want to create a Distribution list to send emails in a bulk, then it can be created as shown below.
For creating the Domain Aliases through the Client area click on Domain Aliases Tab.
To Login into the webmail from the client are you can click on Go to Webmail.
Once you click on Go To webmail you will be redirected to https://zcs.diademtech.in/ you will be able to login using your credentials.
Note:-In case of any support queries, kindly open a support ticket as shown in the image below.
This article was:
Report an issue
Article ID: 1345
Last updated: 11 Jan, 2022
Revision: 30
Views: 9086
Comments: 0
Tags
Also listed in
|
.PNG)
.PNG)

.jpg)
.png)
.jpg)


.jpg)

.PNG)
.png)


Powered by KBPublisher (Knowledge base software)